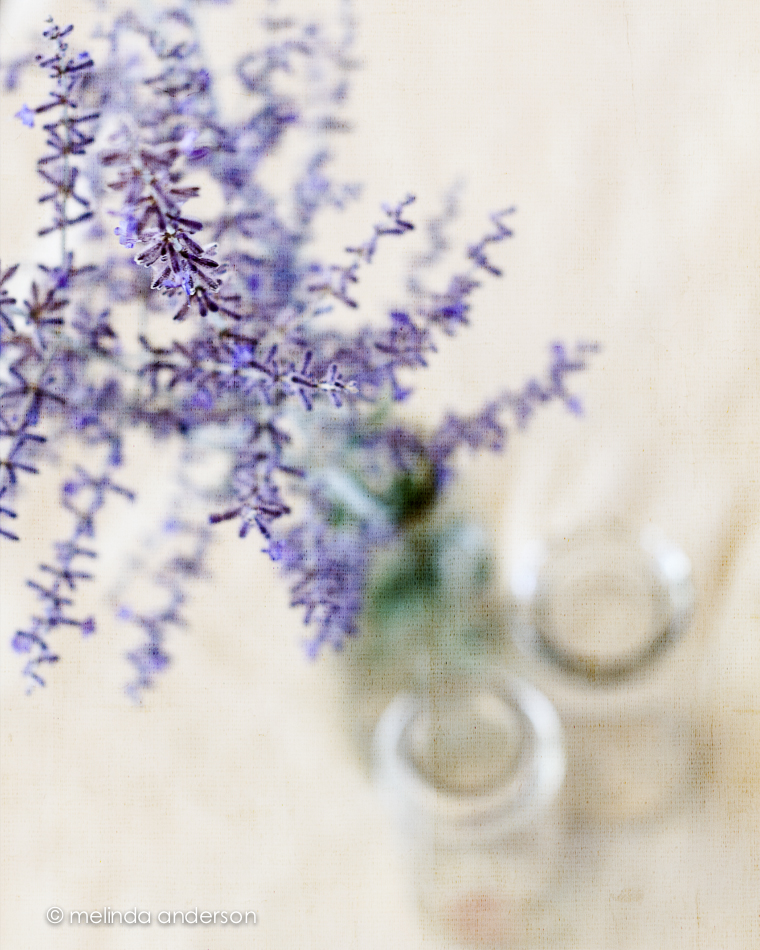
For Be Still 52- side lighting practice:


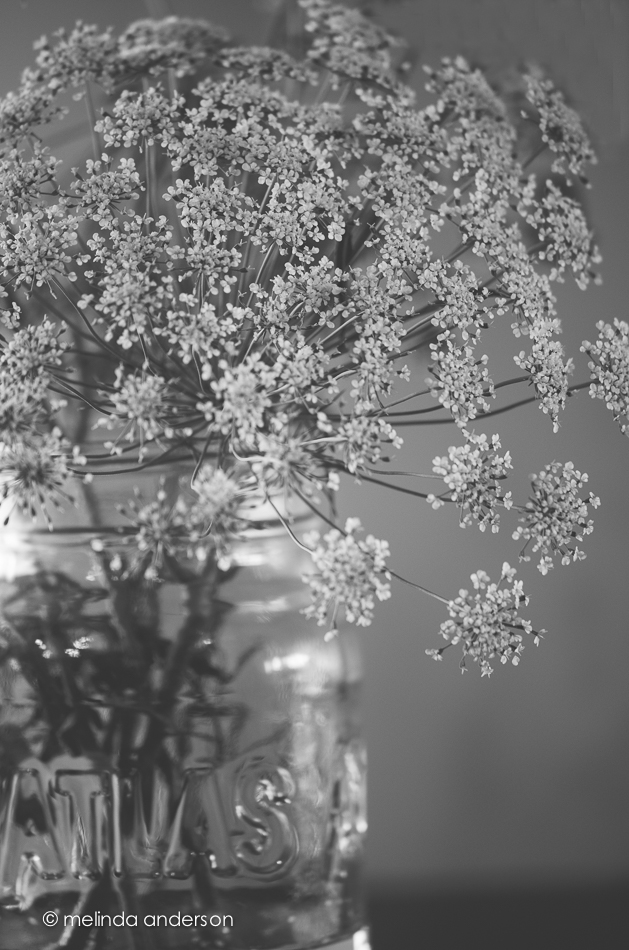
Thank, you, Debbie for the new jar!

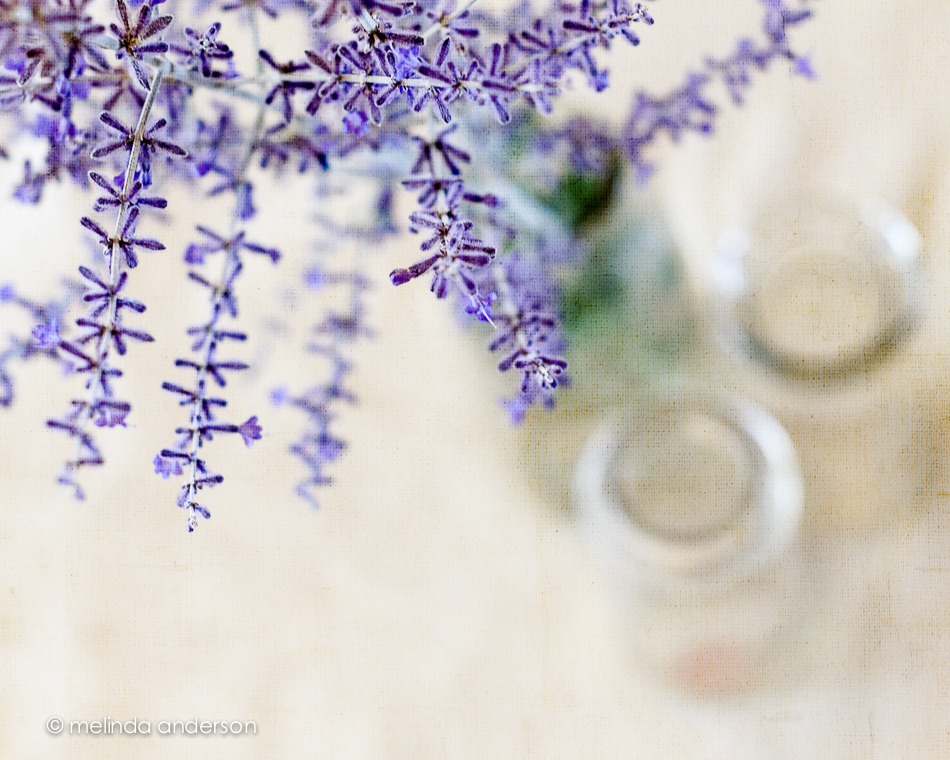
For Be Still 52- side lighting practice:
Thank, you, Debbie for the new jar!
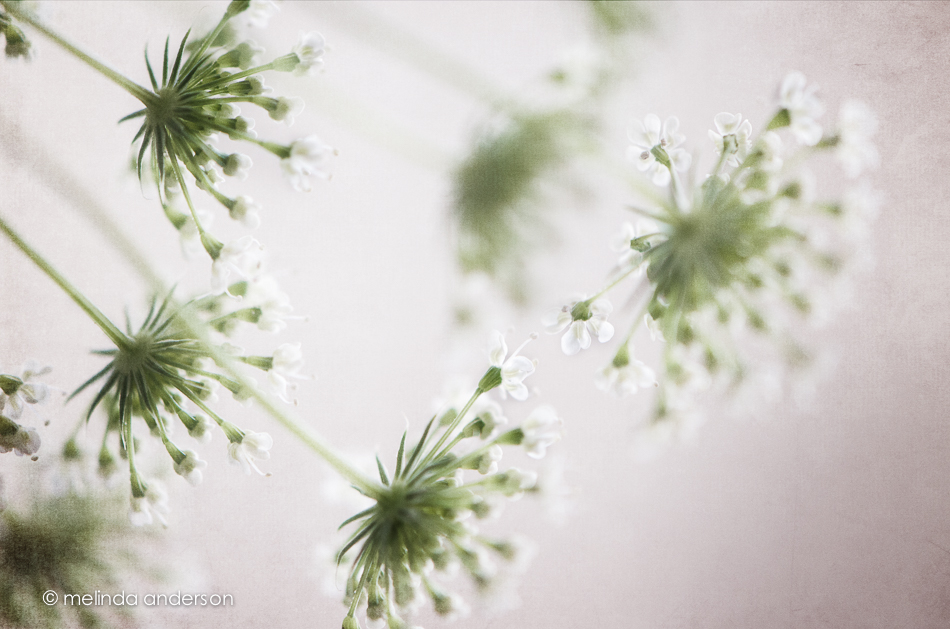
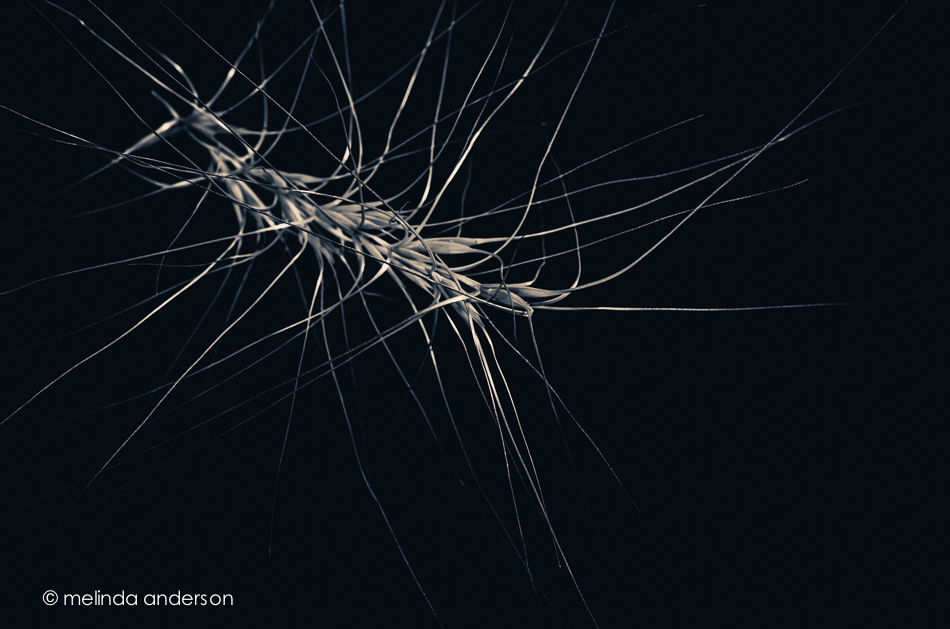
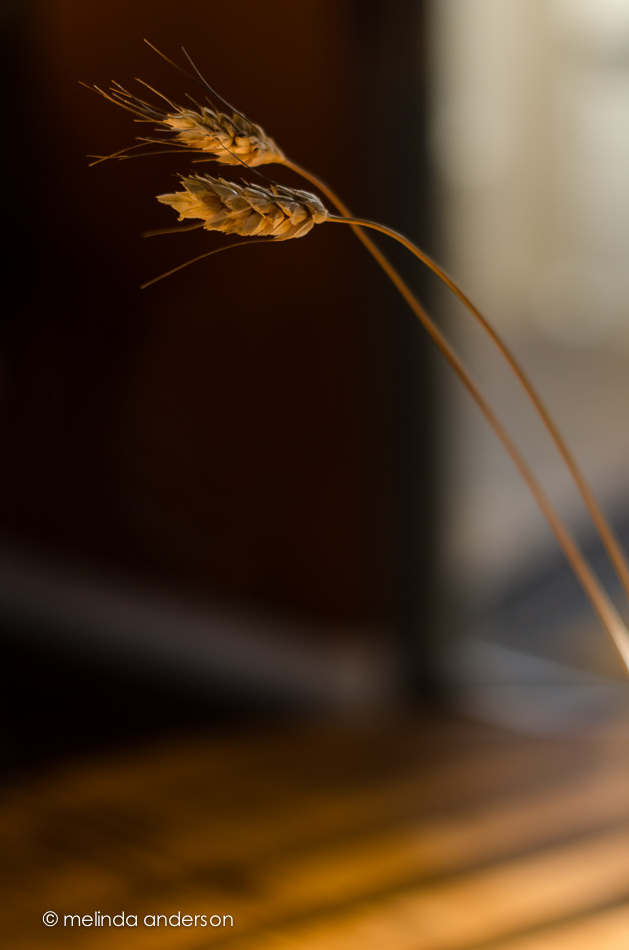
My husband and I took a walk at Willow Lake yesterday and discovered that our favorite trail was now surrounded by beautiful golden weeds, waving and billowing in the breeze. I took a couple iPhone shots and brought home a handful to photograph with my macro lens. One of my current Flickr challenges is STARS, which I’m seeing everywhere in nature this week. The iPhone photo below was edited in Snapseed and PixlrExpress.

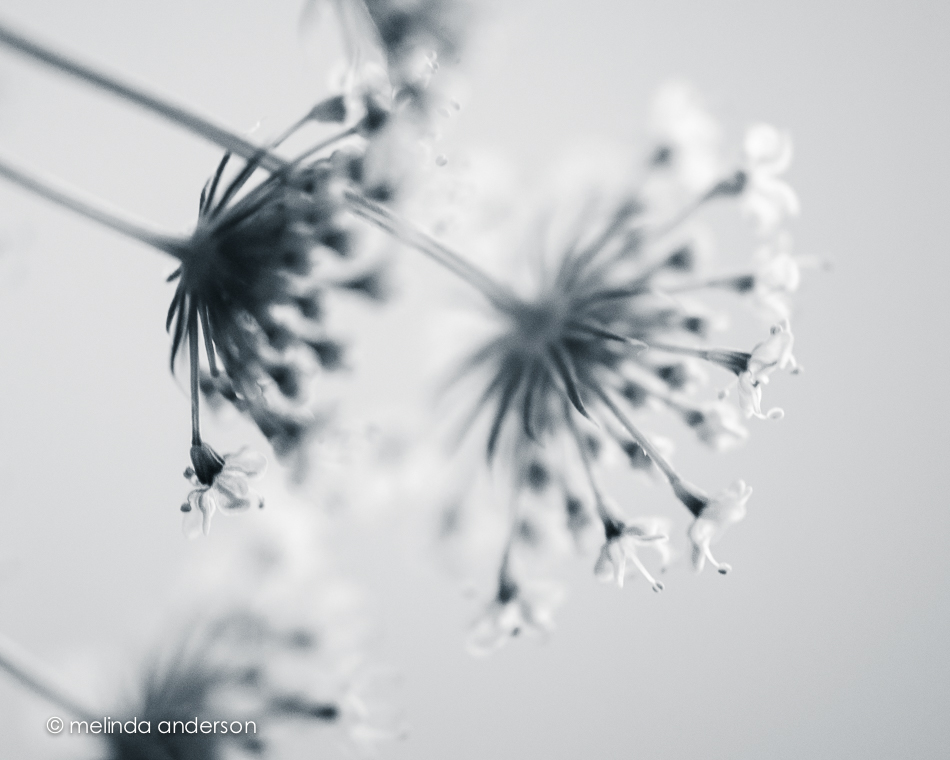
This might be my favorite star photo of the day, edited in Snapseed only.
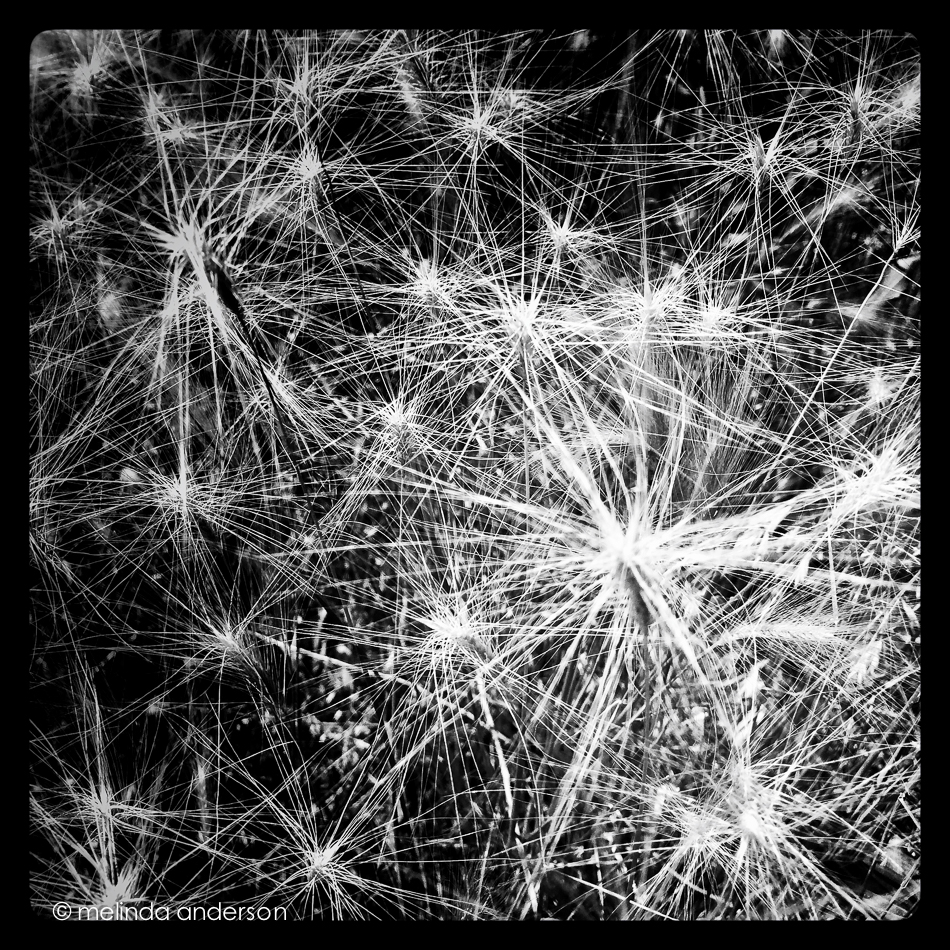
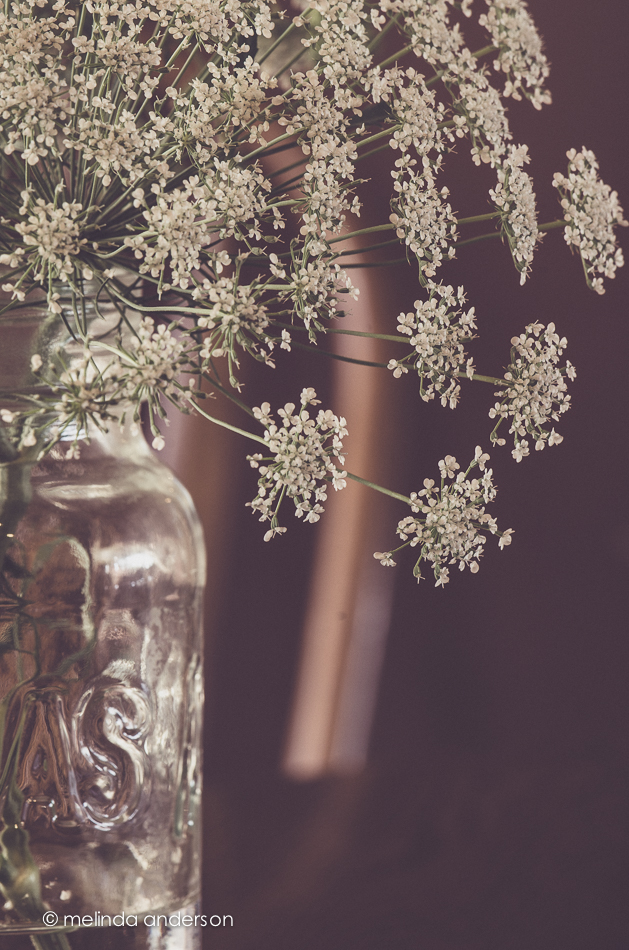
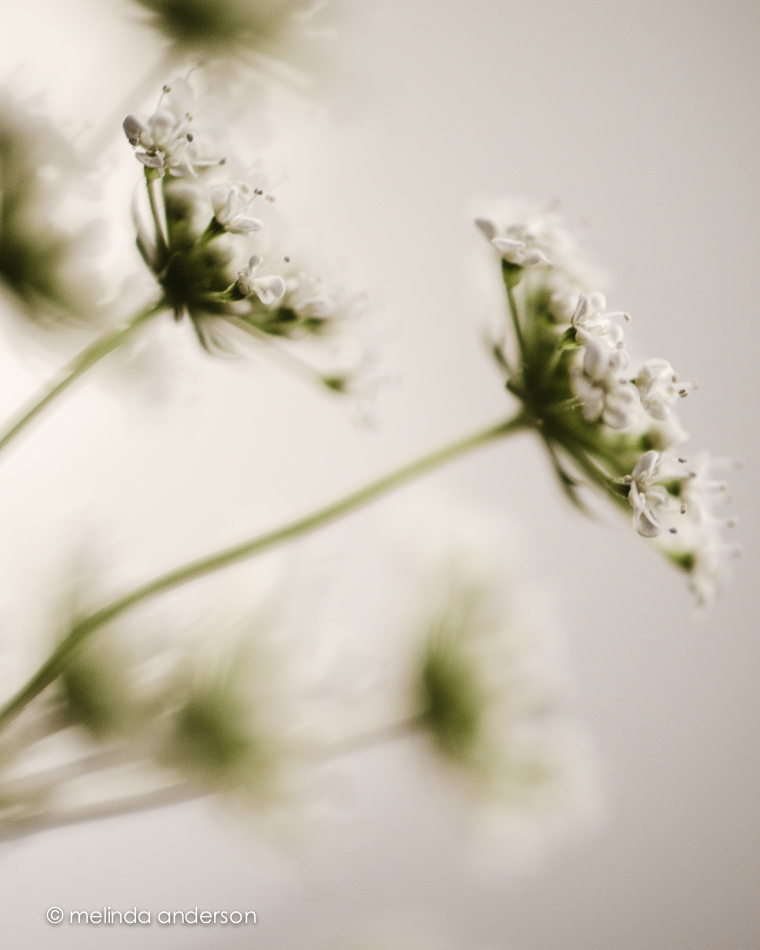
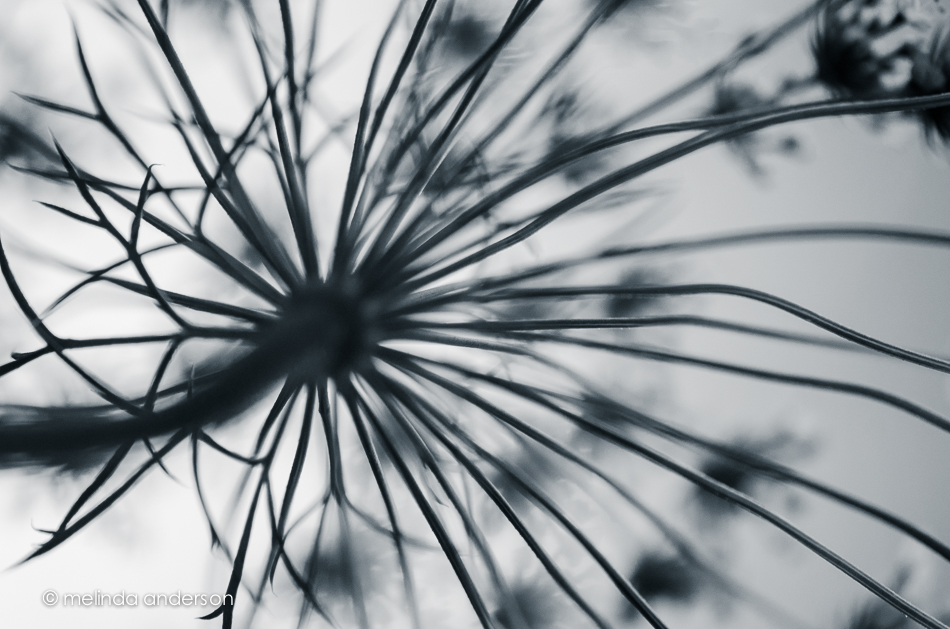
At home, I noticed stars within stars within stars in this flower (Queen Anne’s lace?) that I’ve been using in still life compositions (you’ll see them later this week). I took the photos below with my macro lens on my Nikon.

Linking up with App Happy Wednesday!
It was my first visit to the Prescott Farmers’ Market. I took my camera and enjoyed photographing the produce almost as much as I enjoyed buying and eating it!

I did a basic edit on each photo for my layout and then took them into Photoshop, where I used the Oil Paint filter and one layer of Kim Klassen’s waterfront 1 texture. I used the Oil Paint filter, because Adobe has gotten rid of it in the newest update to Photoshop CC, which I have yet to install. Why??? It was a perfectly good filter- and I did use it occasionally (I like to play with effects).
But the main reason that I haven’t installed the newest update is because of the Mini-Bridge. I LOVE the Mini-Bridge! I use it every time I add a texture- it makes it SO EASY! Plus, I have written actions for many of my favorite textures that include the action opening MB and adding a layer of the specific texture. I haven’t always used Mini-Bridge. I learned it from Kim in one of the classes- and it made my life so much easier. I have my Photoshop workspace set up in a certain way (modeled after the way Sebastian Michaels has his in the Photoshop Artistry class), and I made sure to add the MB icon right at the bottom where I can easily click on it. Sorry for the rant, but I can’t see why MB has to go!!! I’m not happy with Adobe right now!
Linking up with Texture Tuesday today!
I seldom used portrait orientation when taking photos until a couple of months ago. Now I seem to be doing it regularly! I may have started turning my camera in my bathroom “studio” to avoid getting towels and bathroom fixtures in the shot, but then I continue to use it- especially when I want a shallow depth of field in front of, as well as behind, my subject. My 50mm lens does this beautifully, as well as my 85mm macro lens. I would love to own a LensBaby some day to play with moving the focus around! I did order one for my iPhone (coming in August through the kickstarter deal), which will partially satisfy my desire for this cool lens.
Here are two shots with a vertical (portrait) orientation. The first was taken with the macro lens. I took the photo with both orientations, and liked the vertical one best (those blurry berries in the background and a small unfocused slice in the front). There is some texture added to this image (a bluish one from Kim Klassen- teal?).

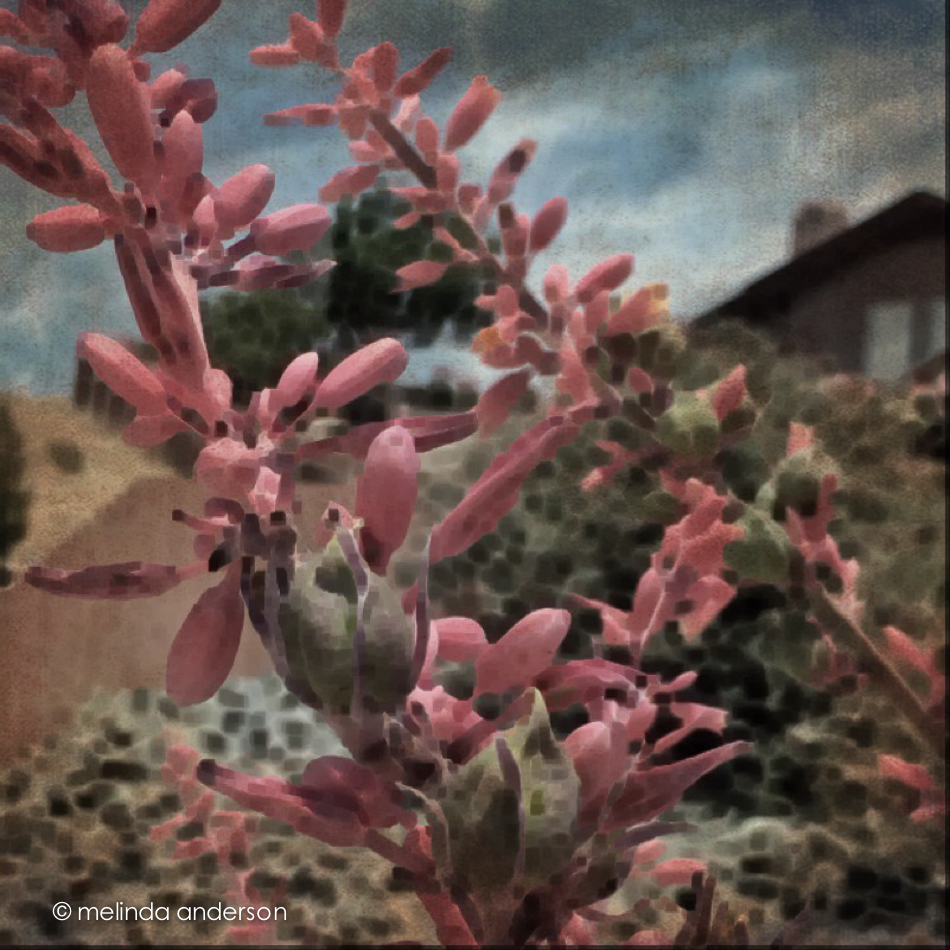
The one below was taken with my 50mm at 1.4 to give a very narrow field of focus- with lots of blur in the front. It was actually taken for a Be Still 52 lesson on side lighting. The cup was placed on the floor by the open front door (on the left for light)- with a piece of white foam board for a background. There is also a bit of lighting coming from the patio door farther away on the right. I used my Warm Black and White preset (some split toning) for the black and white conversion.
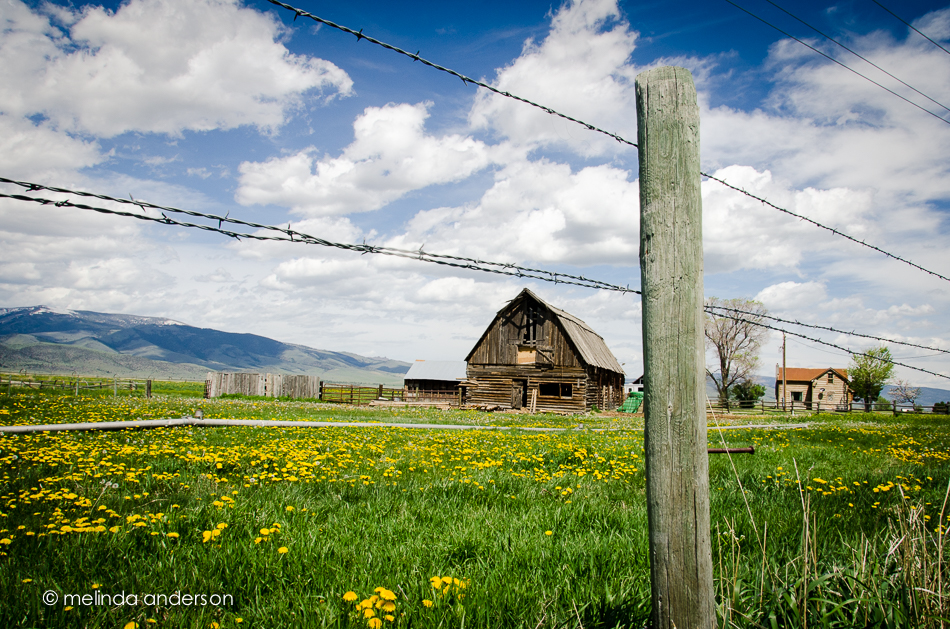
More from the Yellowstone archives- this time from the drive through Paradise Valley (remember that barn?):
Although I have been taking photos since I’ve been back from our trip, I keep finding Yellowstone photos that I haven’t posted here. (no wonder- I took hundreds!). I can’t promise these will be the last. . .


Yes, I’m talking about the weather here in Prescott!
Dozens of these (very photogenic) little things blow up to my front door every day.
And now we seem to have a mini- tumbleweed on the front porch settee.
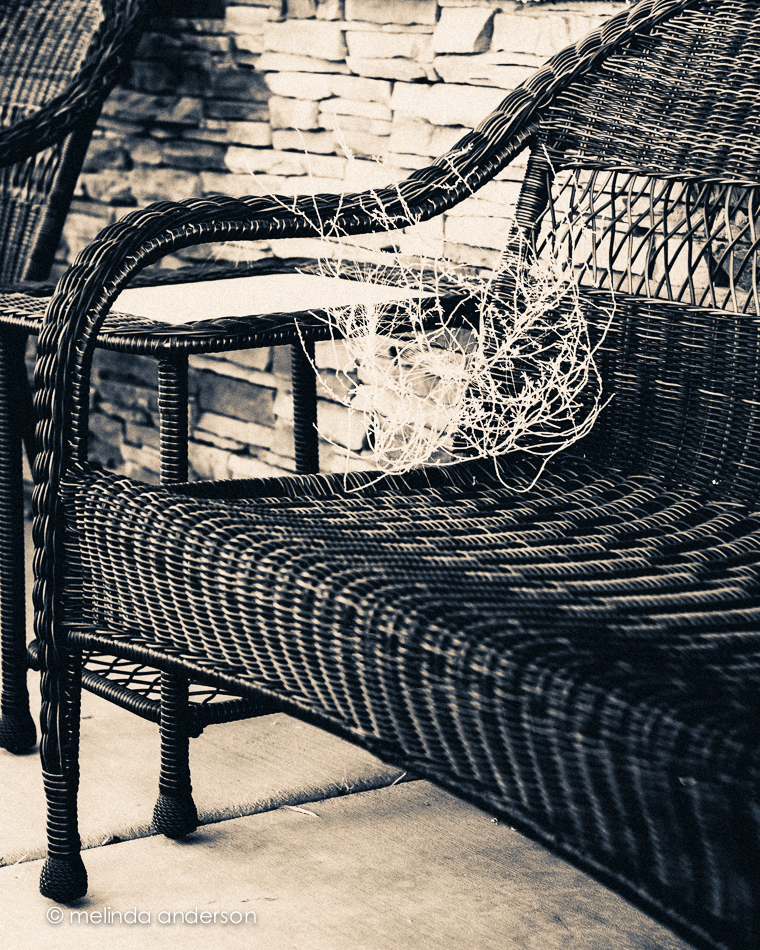

Bring on the monsoon- we need rain!
I was starting to get a bit bored with my iPhone camera. I usually forget to pull it out for a quick shot when I’m using my DSLR- it seems silly. Because I’m not posting any DSLR photos to instagram- just iPhone photos- I often have nothing to upload. Two things have changed in the last couple days- one is participating in the 21 day juice challenge on instagram (#21dayjuicechallenge) and the other is a brand new app. No I’m not on a juice fast; I don’t even drink juice, because of the sugar. I make smoothies, and taking a photo of one every day with my iPhone camera is much less stressful than coming up with something creative! The other change came from reading a fantastic tutorial (featuring the work of an amazing photo artist, Cindy Patrick) on the Pixlr blog that I was alerted to by Terri Porter on instagram- #terriporter (her beach photo using the app is fantastic!). I downloaded the Pixlr Express app- free, as are most of my apps- and am loving the things I can do with it!
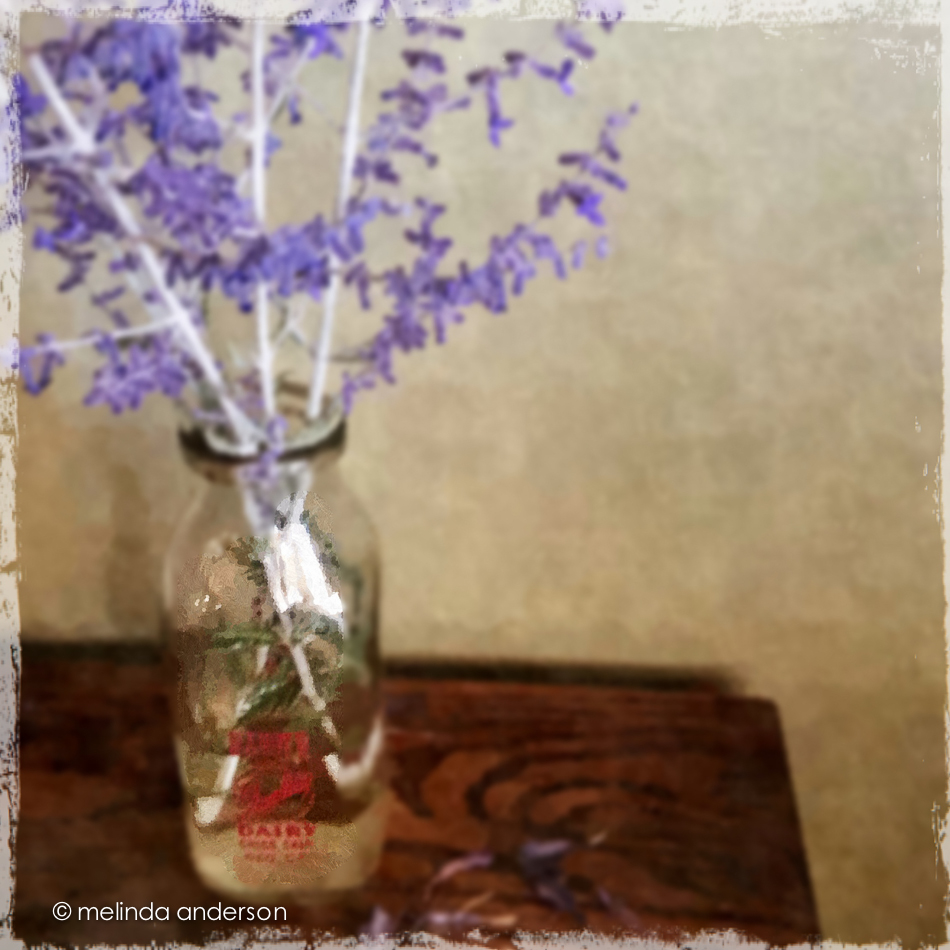
I cropped and did a few minor adjustments in Snapseed, then opened it in PixlrExpress. I used the dapple effect to give it a painted look. I then added blur, masking it off the bottle with the history brush. A frame completed the photo. All of these steps were part of the tutorial, which included much more than I did to this image. Check it out- you will be inspired!

When I was very young, we didn’t go to the store to buy milk; it was delivered to our house. On my trip to Chico a couple months ago, we walked through the antique mall, and I spotted an old milk bottle from Quality Dairy just like the ones that appeared on our doorstep in the 1950’s! Of course, I bought it, and I am using it to hold some of the Russian sage which is in bloom now. 
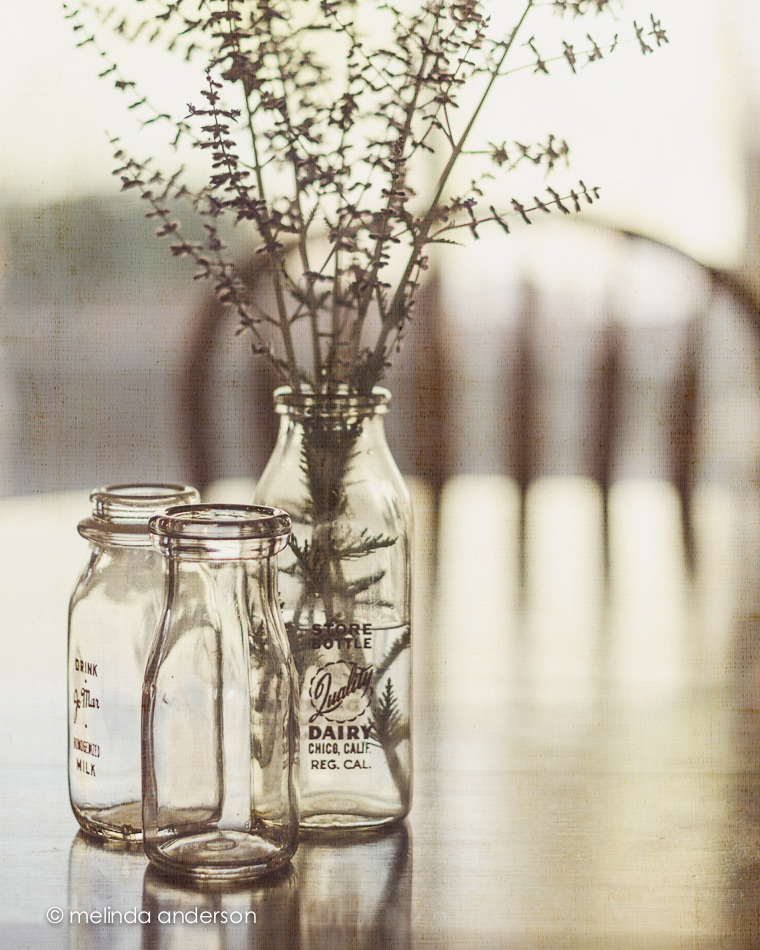

I added Kim Klassen’s waterfront 1 texture to each photo (usually 2 layers at varying opacity) and am linking up with Texture Tuesday today.
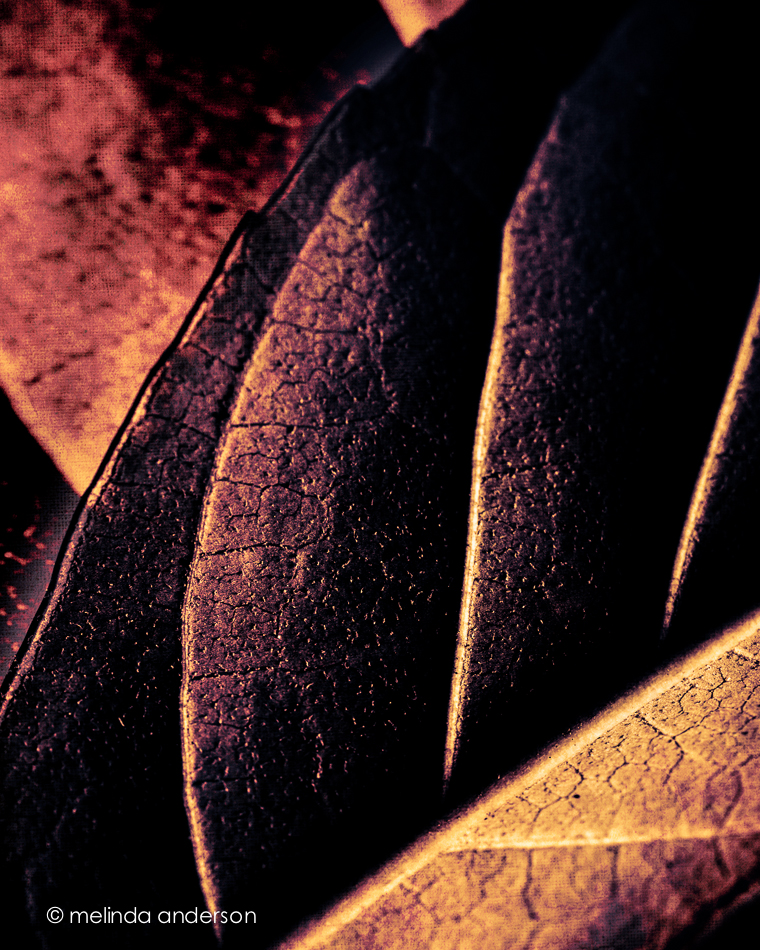
I was uninspired yesterday, but was in a photography mood. I had been intending to photograph some huge leaves that came in a Trader Joe’s bouquet, so set them out and started shooting. When it was time to edit, nothing really appealed to me. I ended up merging two photos and adding a Flypaper texture to create the image below. It is nothing like the leafy, green, backlit shot I envisioned, but I like the contrasting shades and textures.
The second photo practically begged to be taken! I was planning to do a photoshoot with an old milk bottle on my dining table (and I sorta did. . .). But for the first time in this Arizona house, I was captivated by the light! I love the contrast of the light and shadow as the late afternoon/early evening light came pouring through in the sliding glass door. This is why I love photography- it’s those unexpected moments!
The feather that may or may not be an owl feather has been found again! My husband found it on the bedroom floor, where I’ve looked before. All I can say is that the ceiling fan must have been blowing it from place to place. So here’s a new shot, taken on the bathroom counter using my macro lens with a long exposure.
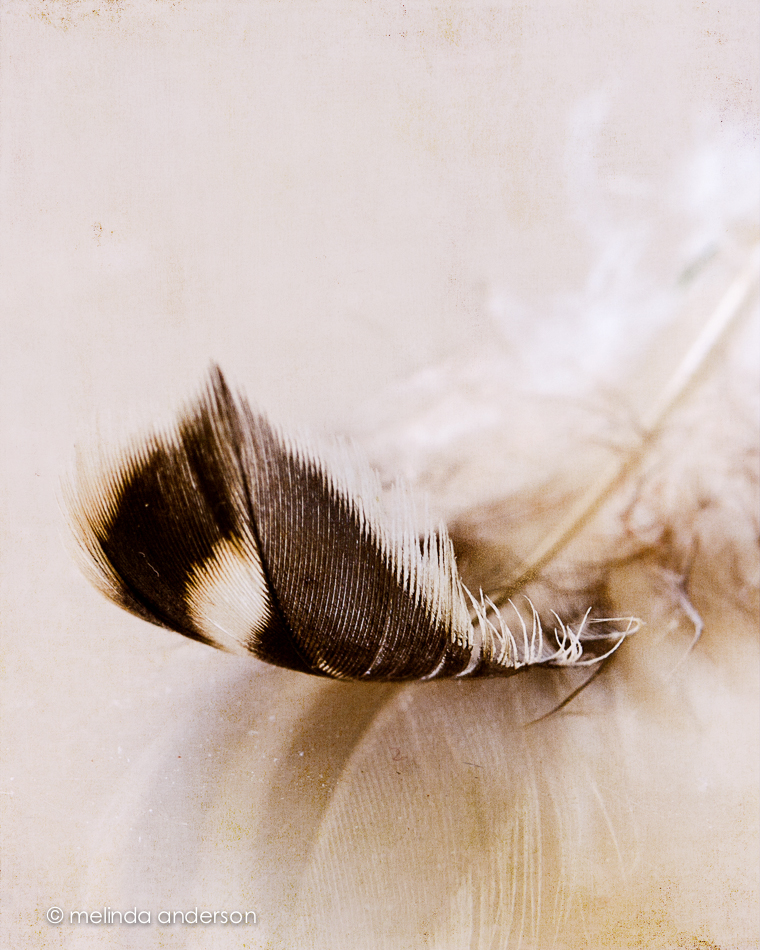
Textured with kk_0303.
My latest still life assignments for Be Still 52 are below. We were challenged to give the subject of our still life “room to breathe.” The first image shows my usual style- off center, close up, shallow depth of field- and part of the subject not in the frame. The second image adds some space surrounding the subject. It was interesting to me how difficult it was to be this far away from what I was photographing- I kept wanting to step closer. A good exercise!
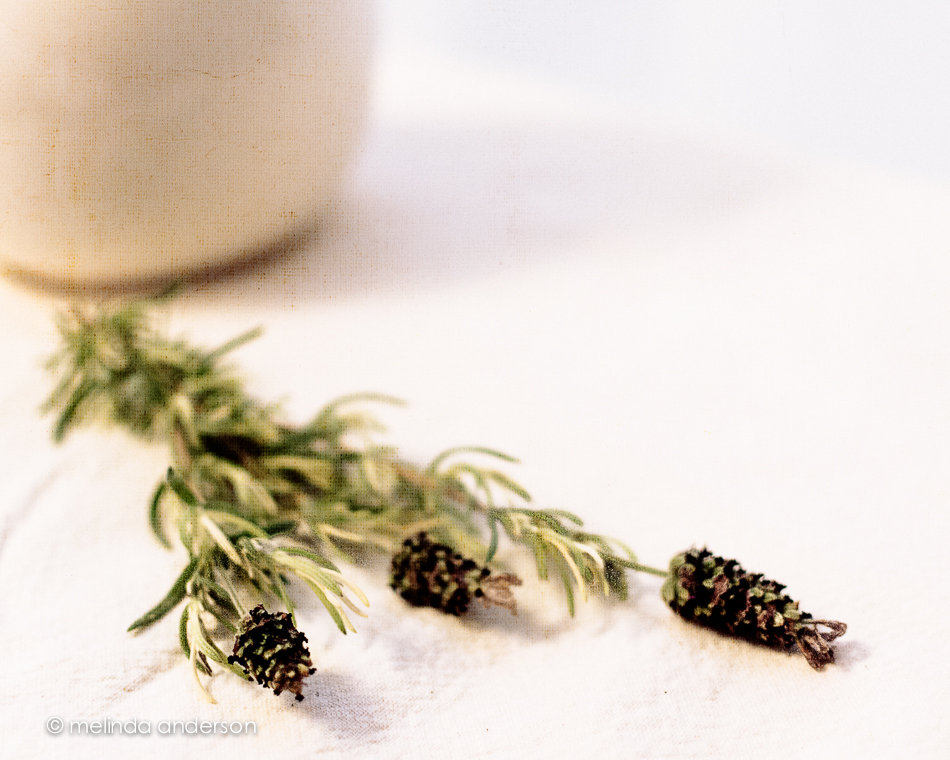
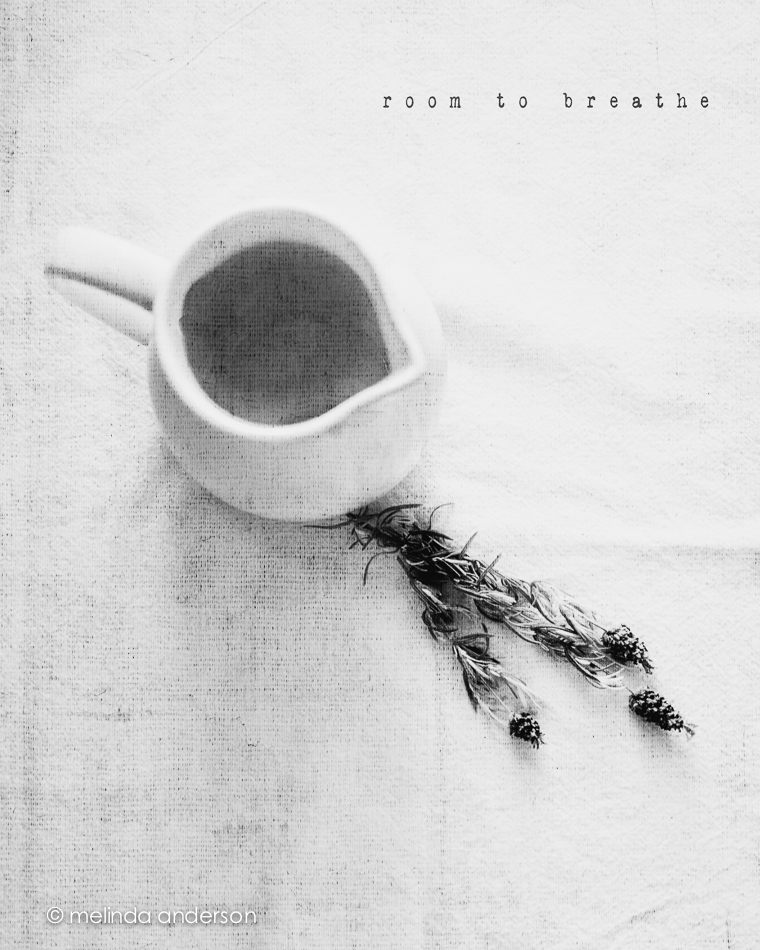 Both photos are textured with Kim Klassen’s waterfront 1.
Since I’ve been back, I’ve been catching up on life, and my photography work has consisted of culling and editing photos from Yellowstone and getting images edited and printed for my photography groups. I was also 2 or 3 weeks behind in Start to Finish and Be Still 52 (Kim Klassen’s classes), but knew I would have time to catch up soon.
A couple days ago I started going through the lessons I hadn’t done and found myself feeling inspired again to create a still life. One of the more recent lessons included a preset called melancholy– and a suggestion to revisit the whole wabi-sabi idea, which I loved. I enjoyed creating this image, which is very different from my usual shooting and processing style.

And now for a couple random iPhone photos. I didn’t take many photos this week, but did enjoy processing them.
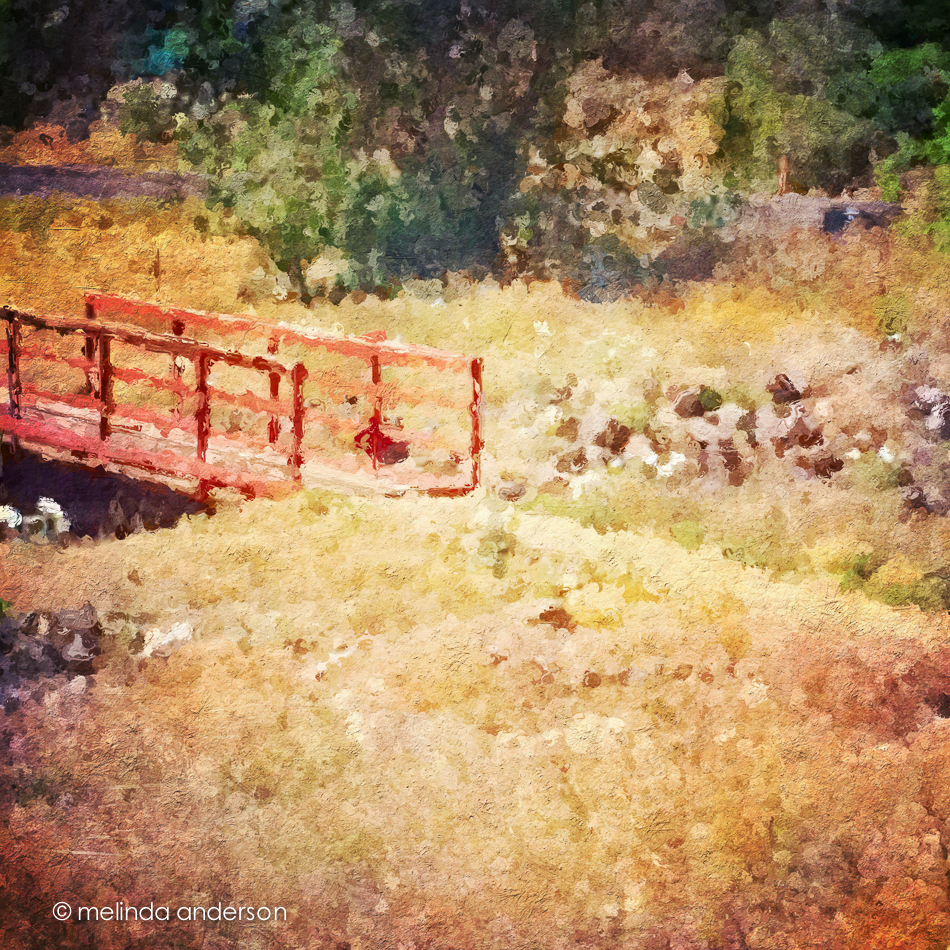
This is the bridge (over a dry wash) that we cross when we walk the trail at Willow Lake. If you look closely, you can see the white southwestern prickly poppies that are in bloom along the trail. The basic edit was in Snapseed- and then I used one of the filters in Glaze (an app that I really don’t understand) and added some textures in Mextures, which also gave it a vignette.
The photo below was taken in our front yard and is a closeup of the flowers (and fruit?) of a spiky foundation planting in our flower bed. Now that it’s blooming, I notice this plant everywhere we go in Arizona. Last fall I cut off many of the dried stalks and put them in my old milk can on the front porch. You can see what they look like dried here. I edited the photo in Photo Wizard, which is a great app for basic editing (it even has a curves adjustment!), as well as having a zillion special filters and effects, from textures and vignettes to motion blur and a bathroom glass filter. I have yet to explore it fully- guess I need to go on another road trip!
I’m linking up with App-happy Wednesday again!
I am well aware that the title of this post could be referring to ME- so please resist making a joke! 🙂
On our drive in Paradise Valley (see yesterday’s post), I mentioned to Miles that I was going to be looking for barns and for old things to photograph. He commented that he LOVES things that are old and falling apart (again, please resist the joke!). I checked with his mother later, and it is TRUE- he is drawn to old, falling apart things- pretty cool for a six year old!
So look what we found!
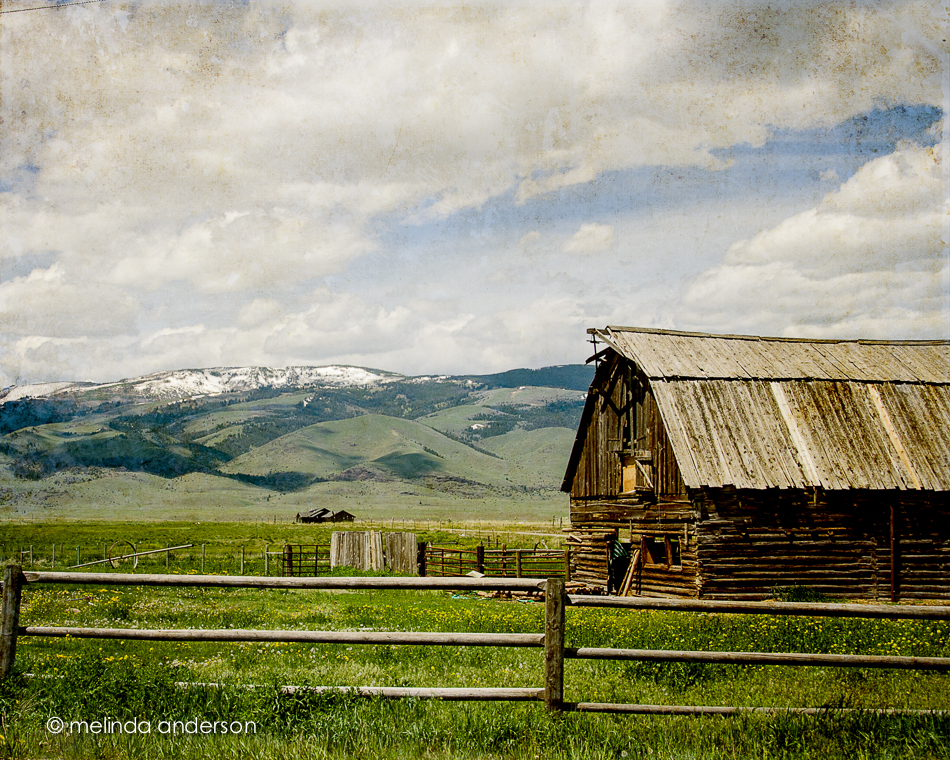
Oh, I so love this barn! And the yellow flowers in front- so cool! This one was textured with 2 layers of golden by Kim Klassen.
And then there is the shot below of the same barn. I wanted the photo to look old too (although, realistically, the barn should look NEW in an old photo, right?), so I edited it and re-edited it- and edited it again- way too much time spent on this photo. Basically, I added a couple textures, brought it back to Lightroom and then decided I wanted a vintage look. Instead of starting over, I took the photo into Silver Efex Pro and used one of their presets to give it a tintype took. But the clouds had gone away! So I brought the new version in AS A LAYER over my original version in Photoshop and blended them. Then I kept playing with the textures (all Kim’s- mostly her older ones), adding and subtracting them until it looked the way I wanted. No point in naming the textures for you- I masked out and reduced opacity so many times- it would make no sense- ridiculous!

And finally- when we had finished our drive, we were in Livingston, where we took Miles out to lunch at his favorite Mexican restaurant. When we got into the car to drive back to Yellowstone, he pointed out something for me to photograph- he has quite the eye, huh? So proud of him!
Linking up with Texture Tuesday.
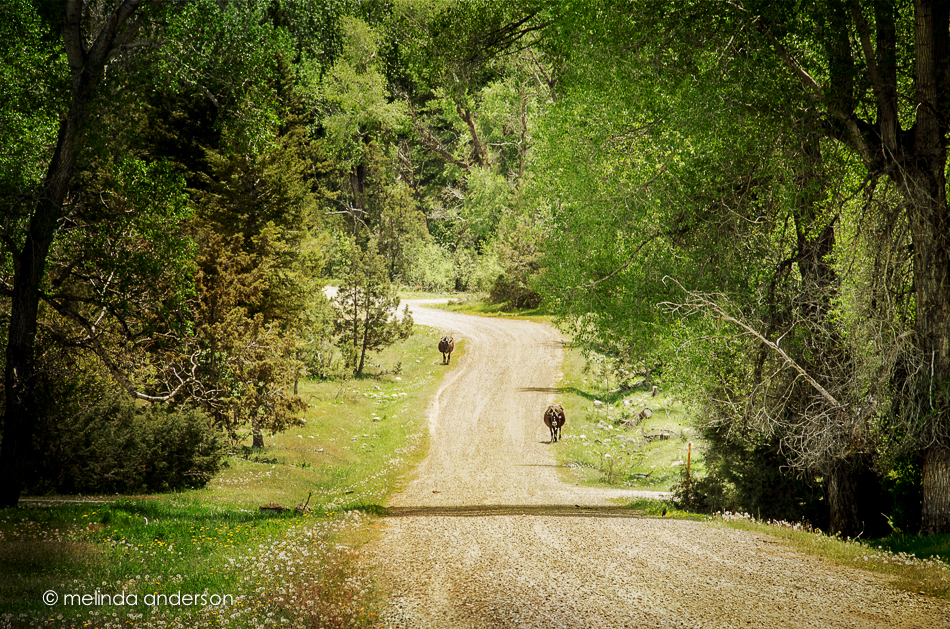
One of my favorite Montana drives is between Livingston and Gardiner, Montana- aptly named Paradise Valley. My husband, our oldest grandboy, Miles, and I took a leisurely drive through the countryside so that Gramma could photograph barns and the beautiful scenery that abounds there.
There were country roads . . .

and cows, of course . . .
and beautiful red barns!

You might see a few more images from this drive in future posts; I took dozens of photos!
